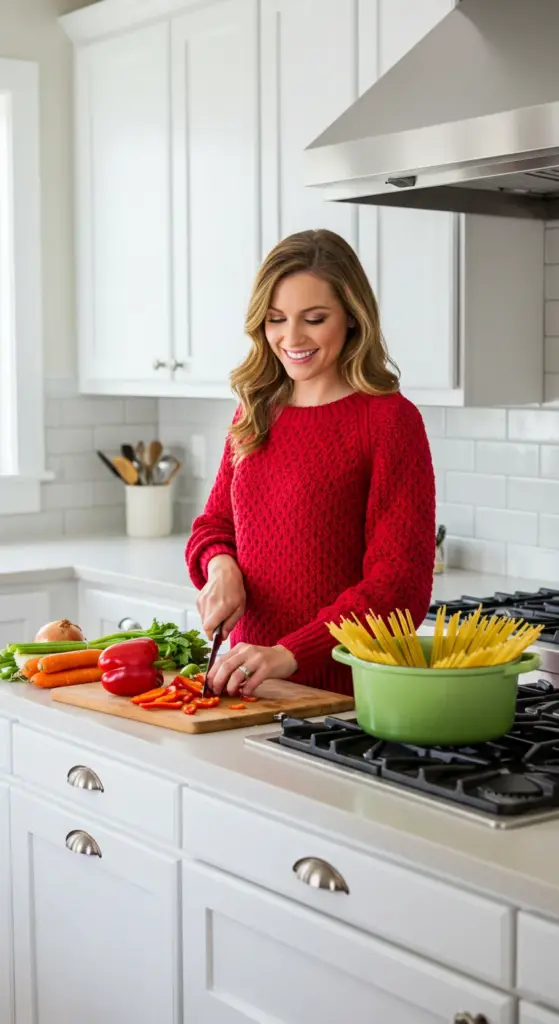
Introduction to Garlic Bread Rolls
When it comes to comfort food, few dishes rival the warm, buttery goodness of homemade garlic bread rolls. Whether you’re serving a cozy family dinner or hosting friends for a movie night, these rolls can elevate any meal with their irresistible aroma and delectable texture. But why settle for store-bought when making them from scratch is surprisingly easy?
Why homemade garlic bread rolls are a game changer
There’s something uniquely satisfying about creating your own food, especially when it’s as delightful as garlic bread rolls. First off, the quality of ingredients you choose directly influences the final product. By making these rolls at home, you can opt for fresh garlic, real butter, and fragrant herbs, ensuring each bite is bursting with flavor. Plus, you have the flexibility to modify the recipe to suit your taste. Want to add a hint of spice? A sprinkle of red pepper flakes can do wonders.
The difference in freshness is another compelling reason to craft your own! A study by the Culinary Institute of America shows that fresh ingredients can enhance nutritional value and flavor, so why not take advantage of that? You might find yourself whisking your rolls away while, unbeknownst to you, a new favorite dish is being born right in your kitchen.
Let’s not forget about the sense of pride that comes with homemade cooking. Imagine pulling a tray of golden-brown, buttery garlic bread rolls from the oven, their aroma filling your home. It’s not just about the taste; it’s an experience. And let’s face it—who doesn’t love dining on warm, fluffy rolls that can complement salads, soups, and even Turkey Bacon dishes?
Plus, they are super versatile! You can enjoy garlic bread rolls on their own or get creative by stuffing them with cheese, herbs, or even savory fillings. Don’t hesitate to invite your friends to join in the fun; bread-making can be a rewarding group activity! With so many possibilities, your homemade garlic bread rolls could become the star of your next gathering.
Ready to dive into the recipe? Let’s get rolling!
Ingredients for Garlic Bread Rolls
When it comes to crafting those delightful garlic bread rolls, having the right ingredients truly makes all the difference. Here’s a straightforward list to get you started on making rolls that are not only easy to prepare but also fantastically delicious!
Essential ingredients for the perfect rolls
- All-purpose flour: The backbone of your rolls, providing that soft, chewy texture. Aim for about 3 to 4 cups, depending on the dough’s consistency.
- Active dry yeast: This magical ingredient will help your rolls rise, giving them that perfect fluffiness. About 2 ¼ teaspoons should do.
- Warm water: Activating the yeast is crucial! The water should be warm but not too hot—think cozy bath temperature.
- Butter: For richness and flavor, about ⅓ cup of melted butter mixed into the dough elevates the taste.
- Garlic: Freshly minced garlic adds an aromatic punch that defines your garlic bread rolls. You’ll want to use 4-6 cloves.
- Parsley: Fresh or dried for color and brightness; it pairs beautifully with the garlic.
- Salt: Essential for enhancing flavors; about 1 teaspoon will suffice!
With these ingredients in hand, you’re well on your way to baking irresistible garlic bread rolls that will have everyone coming back for more! If you want to check out more recipes and cooking tips, visit Serious Eats for expert advice.
Preparing Garlic Bread Rolls
Making your own garlic bread rolls at home is a simple and rewarding process. They are perfect for any meal or even as a snack! Let’s walk through each step together, ensuring you have everything you need for these delectable rolls.
Gather Your Ingredients
Before we dive into the fun parts of mixing and baking, it’s crucial to have all your ingredients ready. Here’s what you’ll need:
- Flour: 3 cups of all-purpose flour
- Yeast: 2 teaspoons of active dry yeast
- Sugar: 1 tablespoon (to activate the yeast)
- Salt: 1 teaspoon
- Warm Water: 1 cup (around 110°F is ideal)
- Olive Oil: 2 tablespoons
- Garlic: 4 cloves, minced (or adjust to your preference)
- Parsley: Fresh or dried, for garnish
- Butter: ¼ cup, melted (to brush over the rolls)
Feel free to experiment with the garlic and parsley amounts; it can really elevate the flavor! You can also find useful tips on ingredient selection at sources like Serious Eats.
Mix and Knead the Dough
Once you have everything gathered, it’s time to mix and knead your dough.
- In a bowl, combine the warm water, sugar, and yeast. Let it sit for about 5 to 10 minutes until frothy.
- In a larger bowl, mix together the flour and salt.
- Pour the yeast mixture and olive oil into the flour. Stir until combined.
- Transfer the mixture to a floured surface and knead for about 8-10 minutes. The dough should be smooth and elastic.
If you find the dough too sticky, sprinkle a bit more flour as needed. This is where you can really get your hands into the dough and feel its texture. Kneading is therapeutic, isn’t it?
Shape the Rolls
Now that your dough has come together beautifully, it’s time to shape it into rolls.
- Divide the dough into equal portions, about 12-16 pieces, depending on how big you want your rolls.
- Roll each piece between your palms to form a smooth ball. Place them on a greased baking tray or lined with parchment paper.
Don’t be too hard on yourself if the shapes aren’t perfect. The rustic look adds to the charm of homemade garlic bread rolls!
Let the Dough Rise
The dough will need some time to rise and develop its flavors.
- Cover your rolls loosely with a kitchen cloth and let them rise in a warm place for about 1 hour or until they have doubled in size.
- You can create a warm environment by preheating your oven to its lowest setting, then turning it off and placing the dough inside.
Watching the dough grow is such a rewarding experience! It’s like a little science project right in your kitchen.
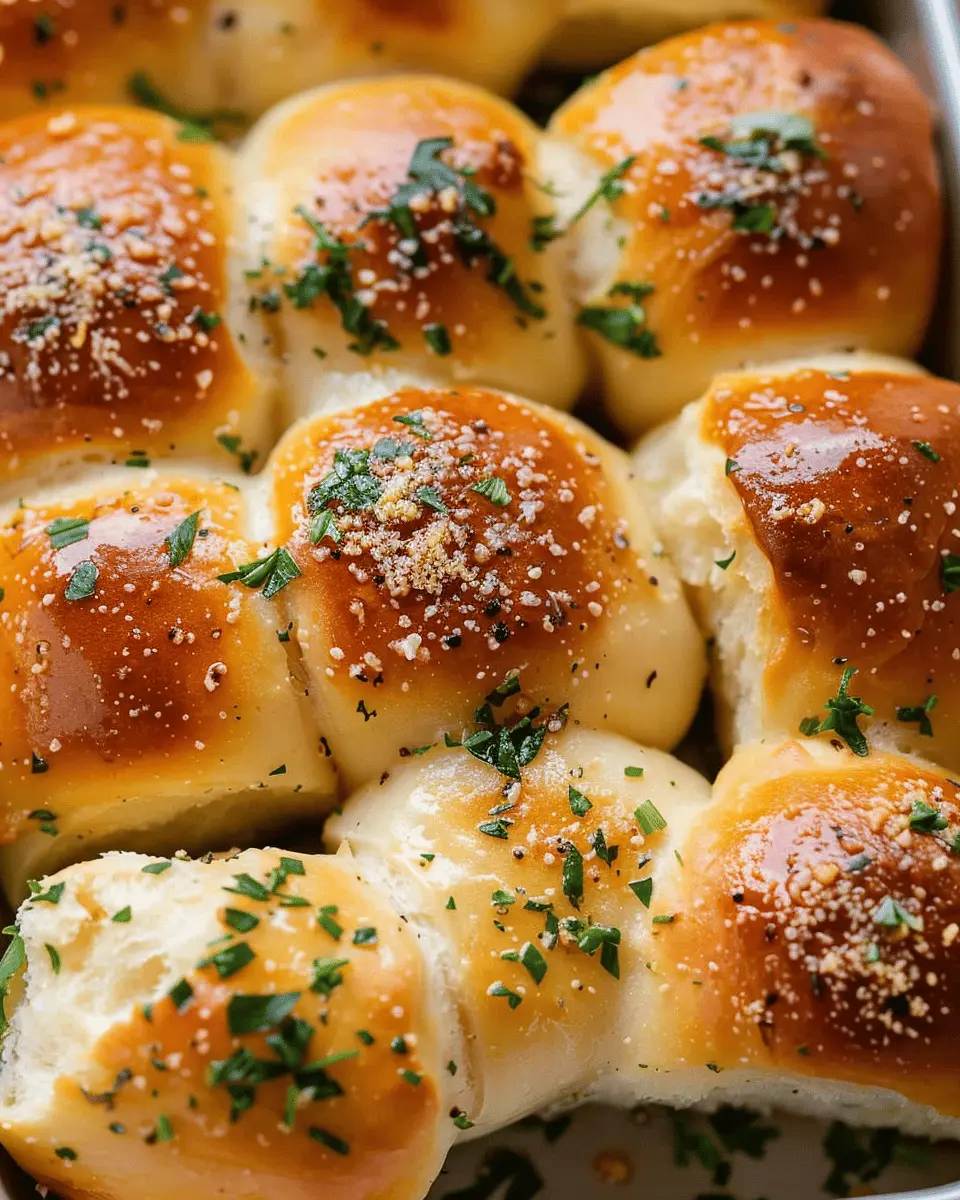
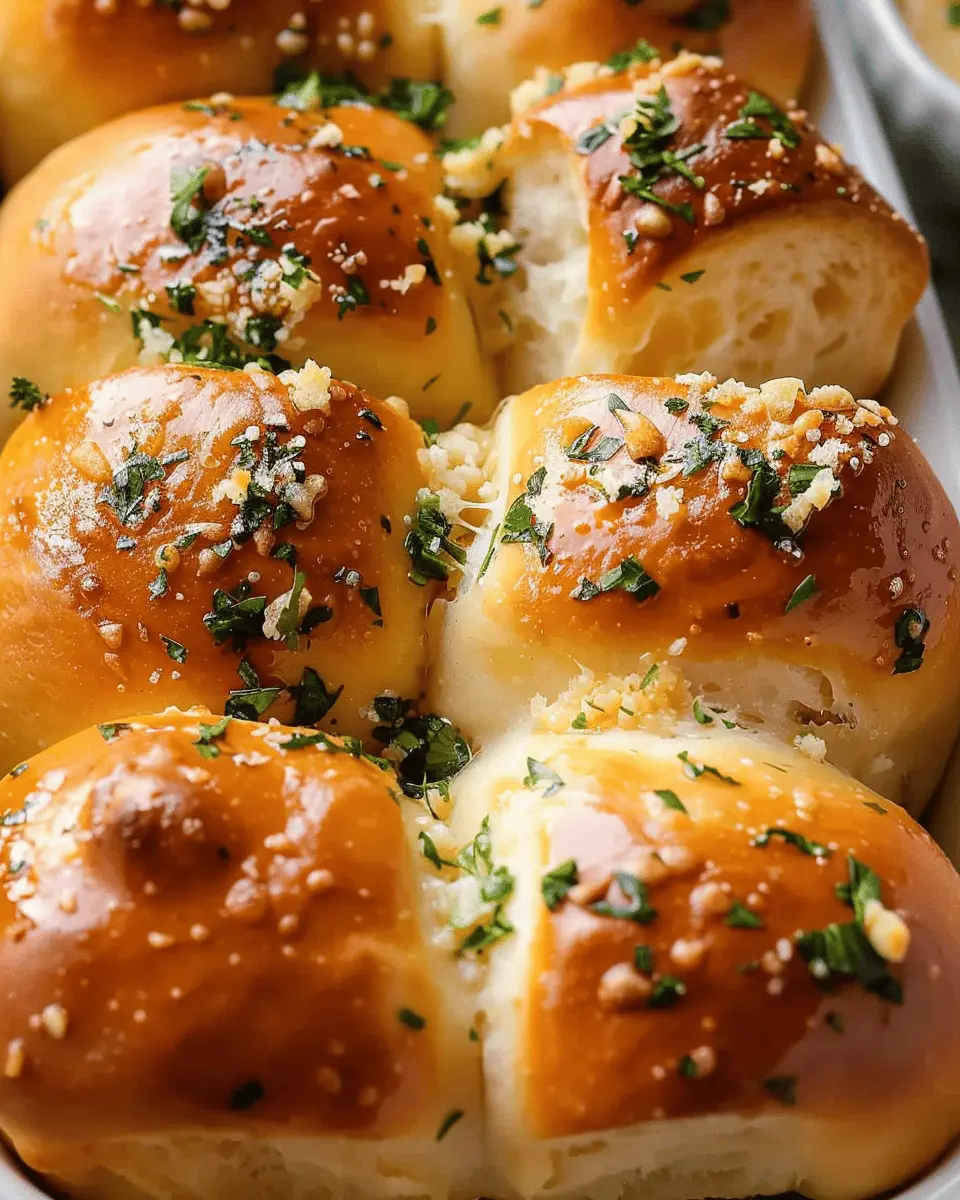
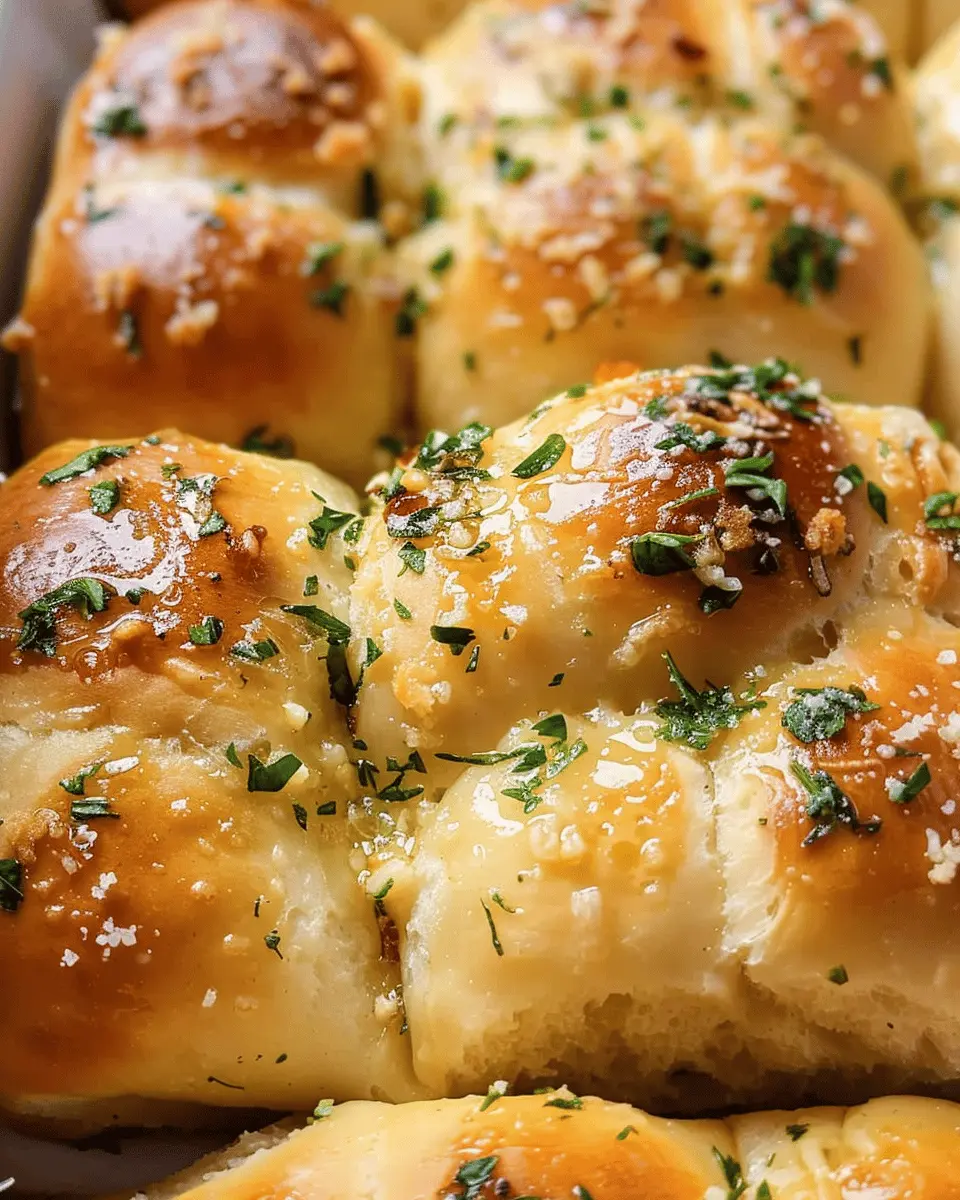
Bake the Garlic Bread Rolls
Once your rolls have risen to perfection, it’s time to bake.
- Preheat your oven to 375°F (190°C).
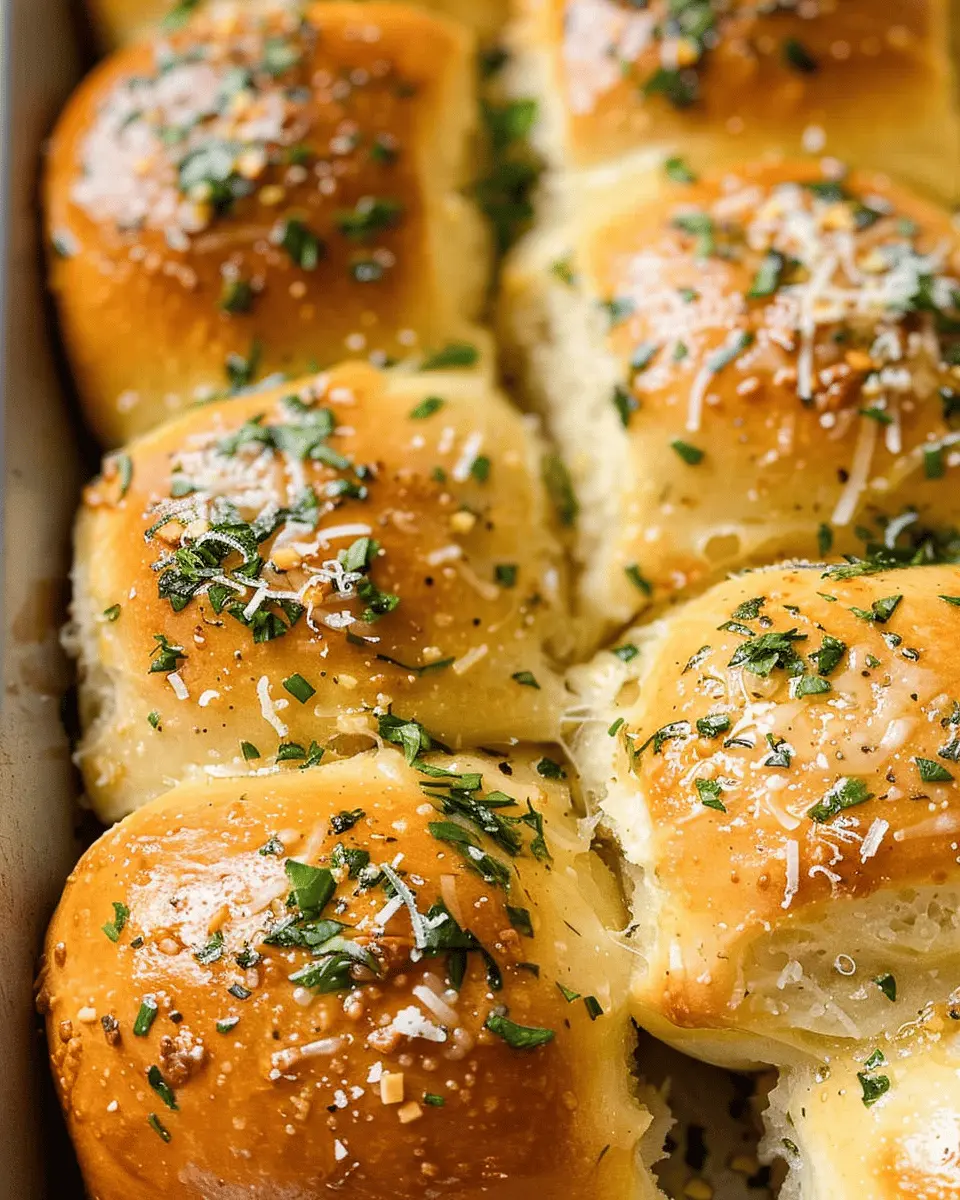
- While the oven heats, brush the tops of your rolls with melted butter mixed with minced garlic and parsley for that extra garlicky goodness.
- Bake for 15-20 minutes or until golden brown.
The smell of baking garlic bread rolls will fill your kitchen, making everyone nearby eager to dive in!
The Final Touch
Once baked, take them out and allow them to cool slightly before serving. You can even drizzle a bit more melted butter for added richness. Serve these rolls warm alongside your favorite marinara sauce or enjoy them as a standalone treat.
These homemade garlic bread rolls are sure to be a hit, whether you’re enjoying a cozy dinner at home or sharing them with friends. Happy baking!
Variations on Garlic Bread Rolls
When it comes to garlic bread rolls, the classics are always amazing, but why not shake things up a bit? Here are two delicious variations that’ll elevate your dinner table and impress even the toughest critics!
Cheesy Garlic Bread Rolls
Let’s start with something every cheese lover dreams of: cheesy garlic bread rolls. These are perfect for gatherings where guests are ready to indulge. Here’s how to make them extra special:
- Choose Your Cheese: Opt for gooey mozzarella or sharp cheddar for melty goodness. Adding a sprinkle of Parmesan on top gives it an irresistible crust.
- Layering Technique: Roll out your dough and sprinkle the cheese generously before rolling it up. This ensures that each bite is bursting with flavor.
- Serving Suggestion: Pair these rolls with a simple marinara sauce for dipping—after all, who can resist that classic combo?
Curious about more cheesy ideas? Check out resources like Food52 for similar cheesy recipes.
Herb-Infused Garlic Bread Rolls
If you’re looking for a lighter, fresher flavor, herb-infused garlic bread rolls are the way to go. They make a fantastic addition to any meal, offering a bright, aromatic experience.
- Herb Selection: Fresh herbs like parsley, basil, or even rosemary can be chopped finely and mixed into your garlic butter. They not only enhance the flavor but also add a beautiful pop of color.
- Add Zing: A squeeze of lemon juice in the herb mixture brings out all those vibrant flavors. You might just find that the zesty element becomes the star of the show!
- Presentation Matters: Consider garnishing with a few sprigs of fresh herbs. It elevates the presentation and gives your garlic bread rolls that gourmet touch.
By experimenting with these variations of garlic bread rolls, you can cater to all kinds of tastes and elevate any dinner or party. Plus, the possibilities are endless—what will you create next?
Cooking tips for Garlic Bread Rolls
The Importance of Precise Measurements
When crafting homemade garlic bread rolls, precision is key. Accurate measurements ensure a consistent texture and flavor profile. For instance, using the right amount of yeast can make all the difference between soft, fluffy rolls and dense, heavy ones. Consider investing in a kitchen scale for precise ingredient portions. This is especially important for flour, which can vary significantly in density.
Troubleshooting Common Issues
Even seasoned cooks encounter hiccups. If your garlic bread rolls turn out too dry, it might be a sign of too much flour or insufficient dough hydration. Incorporate a splash more water or a bit more butter for moisture. Alternatively, under-baked rolls can benefit from a few extra minutes in the oven.
If your rolls didn’t rise well, review your yeast. Old yeast can lead to flat breads. Remember to check the yeast expiration date, and ensure it’s activated properly. For more kitchen tips, check out resources like Serious Eats for expert opinions and guidance. Happy baking!
Serving suggestions for Garlic Bread Rolls
Pairing with Your Favorite Soups
Garlic bread rolls are a fantastic accompaniment to a variety of soups. Imagine cozying up with a steaming bowl of tomato basil soup or a hearty chicken noodle soup, and tearing off a piece of those warm, buttery rolls to dip. The flavors meld together beautifully, transforming a simple meal into a delightful experience. Soups like minestrone or butternut squash also benefit from the savory buttery goodness, adding a satisfying crunch to every bite.
For an extra touch, try serving your garlic bread rolls with a spiced olive oil for dipping. It’s a simple, yet sophisticated twist that might just impress your guests.
Using as an Appetizer for Gatherings
If you’re planning a get-together, consider your garlic bread rolls as the star appetizer. They’re quick to make and can be served with a variety of toppings. Think Turkey Bacon and cheese, or even a lighter option like grilled vegetables.
Don’t forget to provide dipping sauces like marinara or a creamy garlic dip, encouraging your guests to indulge in their favorite flavors. Offering these rolls alongside a simple salad or charcuterie board could make them the hit of the night, turning casual mingling into a full culinary experience.
Whether paired with soups or served at gatherings, these garlic bread rolls will surely elevate your dining occasions. For more ideas on soup pairings, check out The Kitchn, and for delicious appetizer combos, visit Food Network.
Time Breakdown for Garlic Bread Rolls
When you crave garlic bread rolls, a little planning goes a long way. Understanding the time commitment for this delicious treat can help streamline your cooking experience.
Preparation Time
Set aside about 20 minutes to gather your ingredients and prep the dough. You’ll need to mix, knead, and shape it into rolls, so make sure you have everything ready!
Rising Time
The dough needs to rise for approximately 1 hour. This step is essential for developing that delightful, fluffy texture. While waiting, you can take a breather or start on your favorite pasta dish.
Baking Time
Once your rolls have risen, it’s time for a quick 15-20 minutes in the oven. This is when the aroma of garlic and bread fills your kitchen, making it hard to resist!
Total Time
In total, you’re looking at about 1 hour and 45 minutes from start to finish. Think of it as the perfect opportunity to prepare a savory side salad or gather your loved ones for dinner!
For more tips on perfecting your garlic bread rolls, check out resources like King Arthur Baking and Food Network. Enjoy the process and the delicious rewards!
Nutritional Facts for Garlic Bread Rolls
When you’re whipping up a batch of garlic bread rolls, it’s always good to know what you’re indulging in. Here’s a quick look at the nutritional breakdown:
Calories
Each roll typically packs around 150-200 calories. It’s a delightful treat that won’t completely derail your diet, especially when enjoyed in moderation.
Total Carbohydrates
These flavorful rolls contain about 30-40 grams of carbohydrates. Carbs give you that quick energy boost, making them a fantastic sidekick to your salad or pasta dish.
Protein
Garlic bread rolls aren’t a protein powerhouse, but you can expect around 4-6 grams per serving. To up the protein ante, consider pairing them with a protein-rich dish or adding some toppings like Turkey Bacon or Chicken Ham.
For more insights on healthy eating, check out Healthline’s Nutrition Basics for tips on balance and nutrition. Enjoy your rolls without the guilt!
FAQs about Garlic Bread Rolls
Can I freeze the garlic bread rolls?
Absolutely! Freezing garlic bread rolls is a fantastic way to extend their shelf life. Once your rolls have cooled completely, wrap them tightly in plastic wrap and then in aluminum foil, or place them in an airtight container. They can last in the freezer for up to three months. When you’re ready to enjoy them again, just let them thaw in the fridge overnight.
What’s the best way to reheat them?
Reheating your garlic bread rolls is simple. The best way to restore that delicious texture is to pop them in a preheated oven at 350°F (175°C) for about 10-15 minutes. This method helps to keep them soft on the inside with a crisp exterior. Alternatively, if you’re in a hurry, a microwave will work too, but it might make the rolls a bit chewy rather than crispy.
How can I adjust the garlic flavor?
If you’re a garlic lover, feel free to increase the amount of minced garlic in your garlic bread rolls recipe. You can also experiment with garlic powder for a more subtle flavor. Conversely, if you’re looking to tone it down, simply reduce the garlic quantity or add more butter to balance the flavors.
Can I make these rolls vegan?
Definitely! Making vegan garlic bread rolls is easy and delicious. Substitute the butter with a plant-based alternative, and use non-dairy milk to keep the dough moist. You can even add nutritional yeast for a cheesy flavor without any dairy. Enjoy your rolls that everyone can love!
For more flavorful tips on making garlic bread rolls, check out resources like Food Network or Bon Appétit!
Conclusion on Garlic Bread Rolls
Recap the joy of homemade garlic bread rolls
There’s truly something special about homemade garlic bread rolls. When you pull a batch out of the oven, the warm, buttery aroma fills your kitchen, instantly lifting your spirits. These rolls aren’t just a side dish; they’re a delightful experience that adds an extra layer of enjoyment to any meal.
Making garlic bread rolls at home allows you to customize flavors—think fresh herbs or a sprinkle of cheese—making every bite memorable. Plus, they’re easy to prepare and perfect for any occasion, from casual dinners to festive gatherings. So, gather your ingredients and experience the joy of baking your very own garlic bread rolls. Your taste buds will thank you!
For more inspiration, consider checking out this article on baking fundamentals.
PrintGarlic Bread Rolls: Easy and Irresistibly Flavorful Treats

These Garlic Bread Rolls are soft, buttery, and full of flavor, making them a perfect treat for any meal.
- Prep Time: 20 minutes
- Cook Time: 20 minutes
- Total Time: 1 hour 40 minutes
- Yield: 12 rolls 1x
- Category: Breads
- Method: Baking
- Cuisine: Italian
- Diet: Vegetarian
Ingredients
- 3 cups all-purpose flour
- 1 tablespoon sugar
- 2 teaspoons instant yeast
- 1 teaspoon salt
- 1 cup warm water
- 4 tablespoons unsalted butter, melted
- 4 cloves garlic, minced
- 2 tablespoons fresh parsley, chopped
Instructions
- In a large bowl, mix flour, sugar, yeast, and salt.
- Add warm water and melted butter. Mix until combined.
- Knead the dough on a floured surface for about 5-7 minutes.
- Let the dough rise in a warm place until doubled in size, about 1 hour.
- Preheat the oven to 350°F (175°C).
- Punch down the dough and divide it into small balls.
- Place the balls on a baking sheet lined with parchment paper.
- Melt the remaining butter, then mix in minced garlic and parsley.
- Brush the garlic butter mixture over each roll.
- Bake in the oven for 15-20 minutes or until golden brown.
Notes
- For a cheesy version, add shredded cheese into the dough before baking.
- Serve warm for the best flavor.
Nutrition
- Serving Size: 1 roll
- Calories: 180
- Sugar: 1g
- Sodium: 300mg
- Fat: 8g
- Saturated Fat: 5g
- Unsaturated Fat: 3g
- Trans Fat: 0g
- Carbohydrates: 24g
- Fiber: 1g
- Protein: 4g
- Cholesterol: 15mg
Keywords: Garlic Bread Rolls