Introduction to No-Oven Turkish Bread
What is No-Oven Turkish Bread?
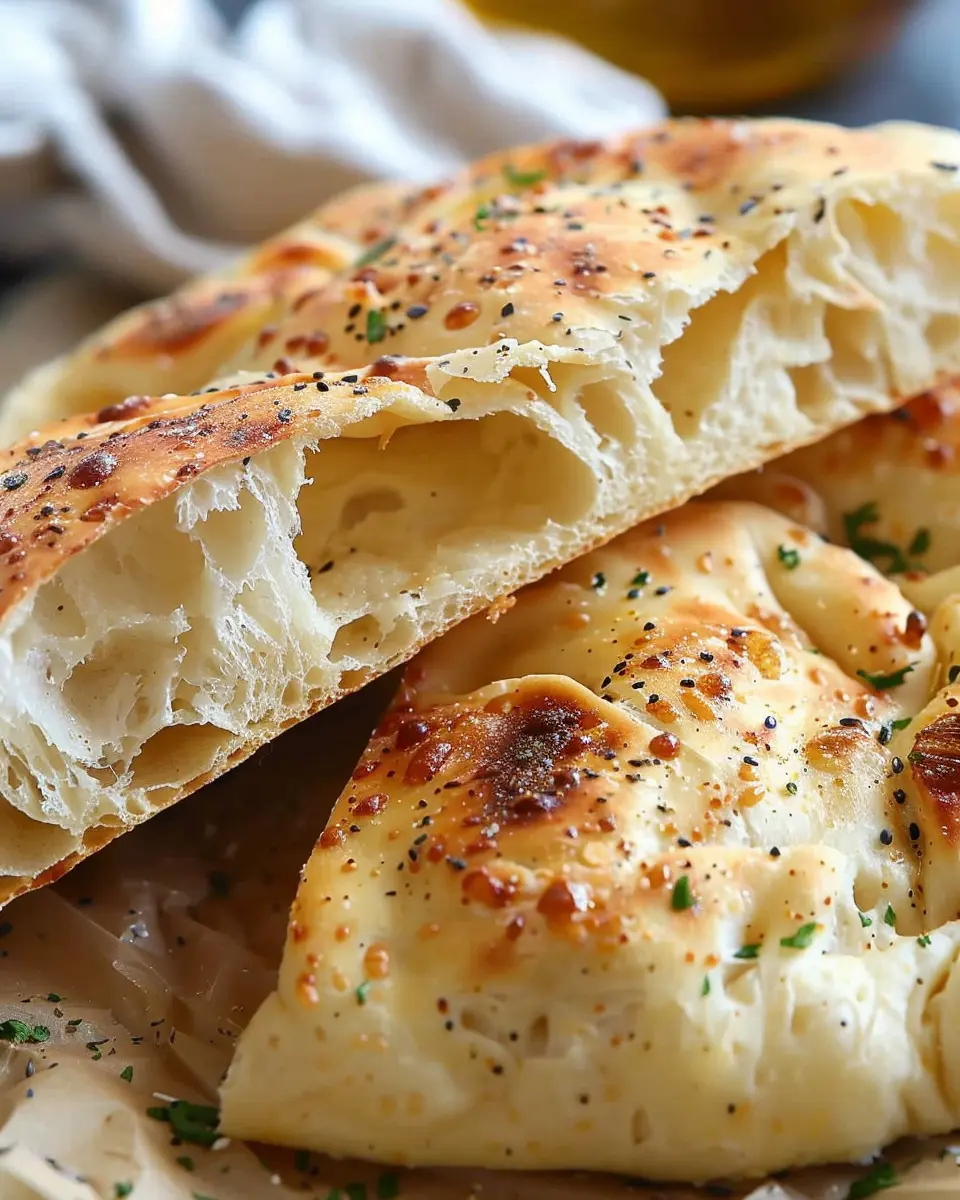
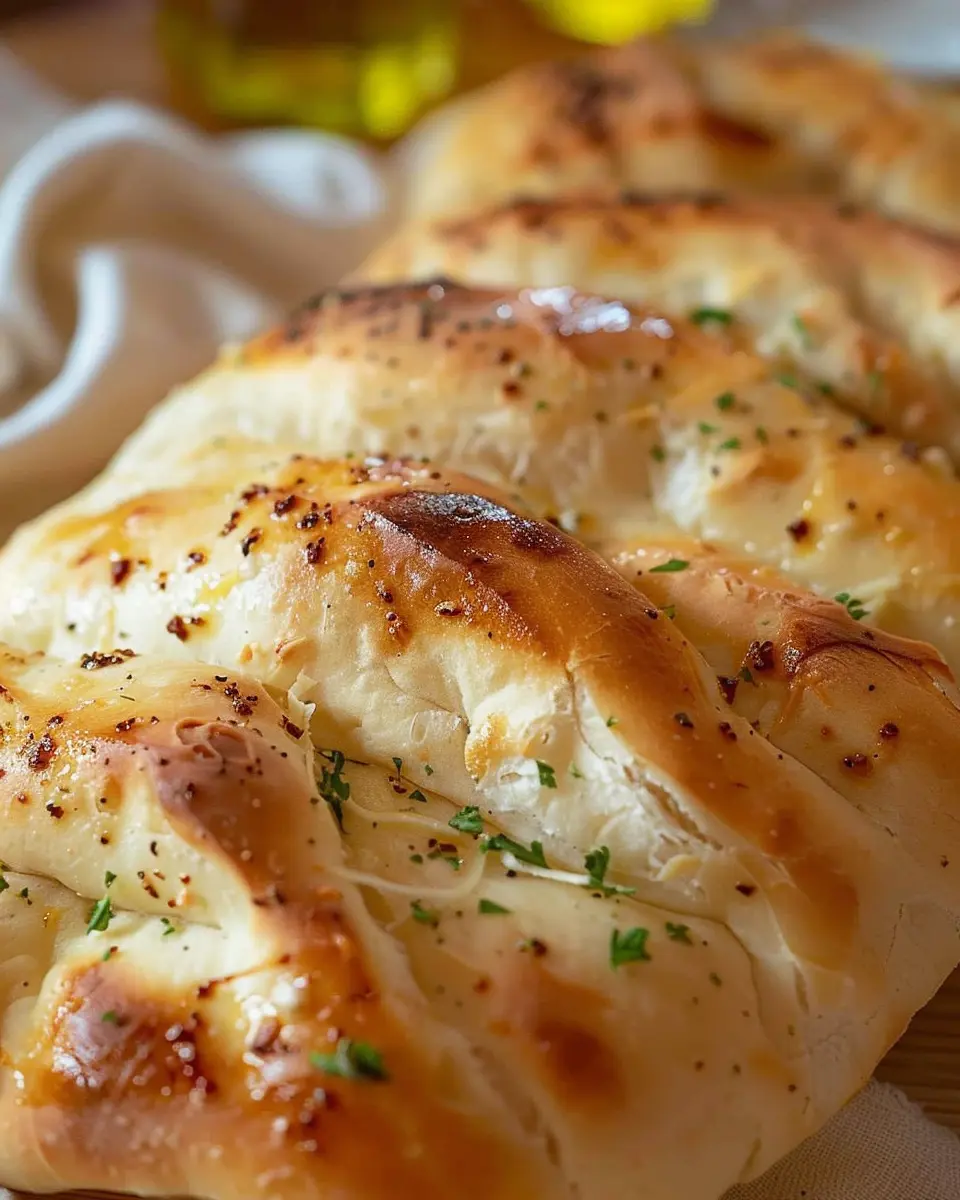
No-oven Turkish bread is a delightful, soft flatbread typically found inMiddle Eastern cuisine. Unlike traditional breads that require an oven and extensive baking time, this method uses a stovetop to achieve a fluffy texture and spectacular flavor. Perfect for wraps, dipping in hummus, or just enjoying with a dab of butter, this bread is versatile and quick to prepare.
This recipe can be a game changer for those who live in small apartments, have tight schedules, or simply prefer a straightforward cooking method. The result? A warm, homemade flatbread without the hassle of an oven!
Why Young Professionals Love Homemade Bread
For many young professionals, life can be hectic. Between working long hours and juggling social commitments, cooking can sometimes fall by the wayside. However, the appeal of homemade bread is undeniable. Not only does bread-making become a therapeutic escape from daily stresses, but it also allows you to create something authentic and delicious.
By taking just a little time to make your own no-oven Turkish bread, you’re not only treating yourself and your loved ones to something special, but you’re also engaging in a rewarding process of culinary creativity. As many people are turning to cooking from scratch, the joy of sharing a warm, homemade flatbread brings people together over simple meals.
Benefits of Making Bread at Home
You might be wondering about the advantages of making your own bread rather than hopping over to the store. Here are some compelling reasons:
-
Quality Control: When you make your own bread, you control what goes into it. Say goodbye to preservatives and mystery ingredients!
-
Cost-Effective: Ingredients for homemade bread are often less expensive than buying artisanal options from the store.
-
Healthier Choices: Customize with whole grains, herbs, or your favorite seasonings to boost nutrition.
-
Skill Building: Creating bread can enhance your cooking skills and give a sense of accomplishment.
So, get ready to roll up your sleeves and discover the joy of making no-oven Turkish bread—it might just become a staple in your kitchen! For more inspiration, check out expert tips on homemade breads at Serious Eats or BBC Good Food.
Ingredients for No-Oven Turkish Bread
Creating delicious no-oven Turkish bread is easier than it sounds! Let’s break down the essential ingredients you’ll need for a mouthwatering outcome.
Essential Ingredients for the Dough
For a fluffy, satisfying no-oven Turkish bread, you’ll need the following ingredients:
- All-purpose flour: About 3 cups for the perfect structure.
- Yeast: Instant yeast works wonders for a quick rise.
- Warm water: Approximately 1 cup – it’s essential for activating the yeast.
- Sugar: A teaspoon to balance the flavors and help the yeast work its magic.
- Salt: About 1 teaspoon to enhance the overall taste.
- Olive oil: 2 tablespoons for richness and moisture.
Mix these ingredients, let them rise, and you’re on your way to creating magic! For a deeper dive into bread-making techniques, check out King Arthur Baking.
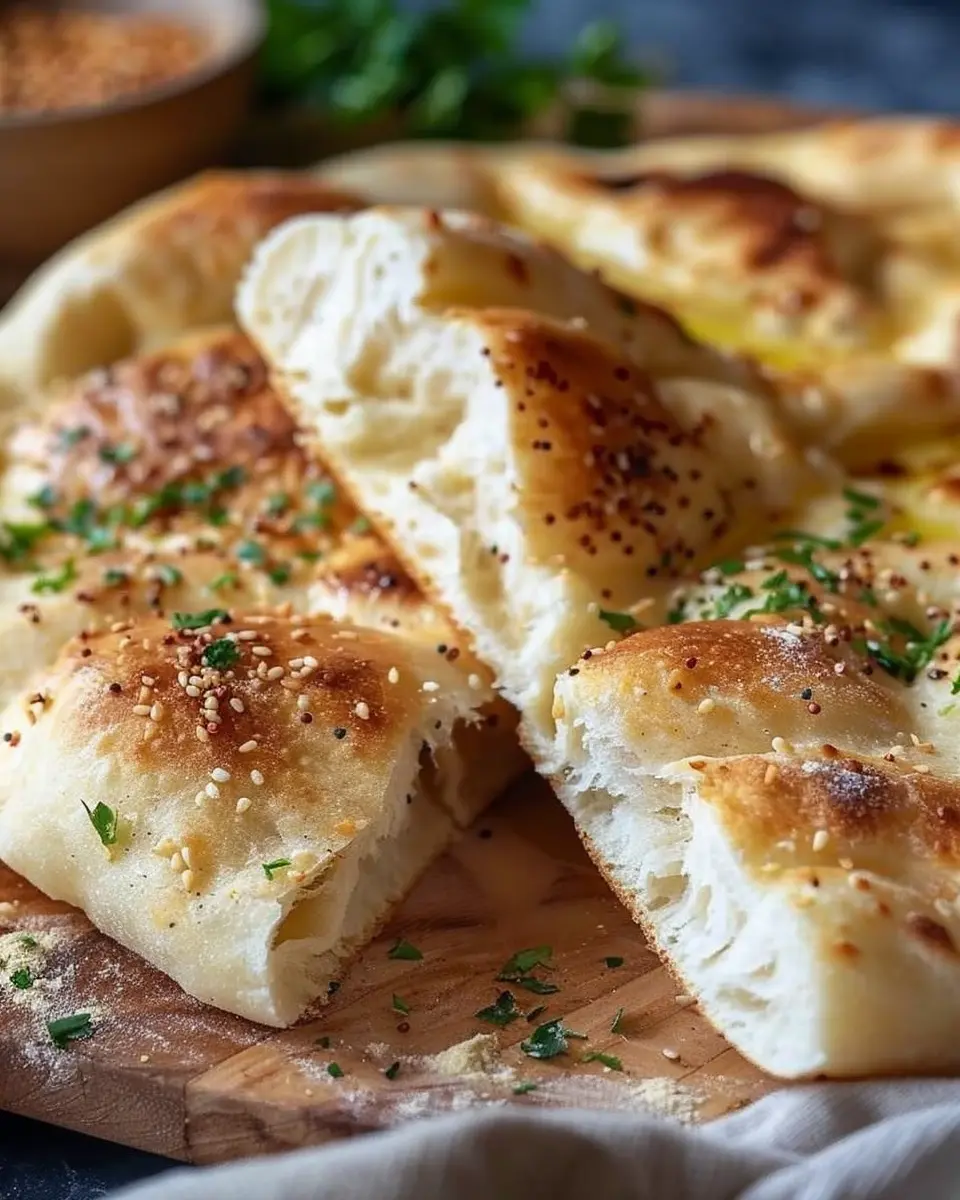
Optional Toppings for Extra Flavor
Want to elevate your no-oven Turkish bread? Consider some exciting toppings:
- Sesame seeds or Nigella seeds for a crunchy texture.
- Chopped herbs like parsley or dill for freshness.
- Flavored oils or lightly sautéed vegetables for extra flair.
Get creative! These toppings not only add flavor but also make your bread Instagram-ready. Why not make it a fun evening task with friends, turning your kitchen into a mini Turkish café?
Preparing No-Oven Turkish Bread
Making no-oven Turkish bread is a delightful way to add an authentic touch to your meals without the need for fancy kitchen equipment. This bread is soft, fluffy, and has that homey aroma that makes you feel at ease as soon as you walk into the kitchen. Plus, it pairs beautifully with a variety of dishes. So, let’s dive right into the process of preparing this tasty bread together!
Gather and Warm Your Ingredients
Before we begin, it’s important to have everything you need right at your fingertips. You’re going to want:
- Flour (all-purpose or bread flour works well)
- Yeast (instant or active dry)
- Salt
- Sugar (to give the yeast something to feast on)
- Water (warm, ideally about 110°F or 43°C)
- Olive oil (for richness)
It’s also a good idea to warm the water slightly – this helps activate the yeast and ensures your dough rises beautifully. If you’re like me and sometimes forget to take ingredients out of the fridge, this could be an excellent moment to heat the water!
Mix the Wet Ingredients
Once you have your ingredients ready, it’s time to mix the wet ingredients. In a mixing bowl, combine the warm water with a teaspoon of sugar and your yeast. Give it a gentle stir and let it sit for about 5 to 10 minutes. You should see some bubbling action as the yeast wakes up and starts to work its magic! This step is crucial; it really gets things going.
While you wait, you can check out this article for more tips on yeast activation and how it impacts your baking endeavors.
Combine and Knead the Dough
Now that your yeast is bubbling with excitement, add your flour, salt, and a splash of olive oil to the yeasty water. Using your hands or a wooden spoon, mix until it forms a shaggy dough. Here’s where the fun begins: knead the dough for about 5 to 7 minutes. You’re looking for a smooth, elastic texture. If it’s too sticky, sprinkle a bit more flour on your countertop as needed.
Kneading is a great way to relieve stress, so don’t hesitate to get a little vigorous with it!
Let the Dough Rise
After kneading, it’s time to let the dough rest. Place it in a lightly oiled bowl and cover it with a clean kitchen towel. Let it rise in a warm area until it doubles in size, which could take about 1 to 1.5 hours. If you’ve got a cozy spot near a heater or in a sunny window, that’s the perfect spot!
While waiting, you might think about how many variations of no-oven Turkish bread you can try—or even what spreads would pair nicely!
Shape and Prepare for Cooking
Once your dough has risen, punch it down gently to release the air, and turn it out onto a lightly floured surface. Divide it into equal portions, depending on how large you want your bread to be. Shape each piece into a round ball and then flatten gently with your palm.
Your goal here is to get a nice, thick disc that is about ½ inch thick. This isn’t just any bread; it’s going to be soft and fluffy!
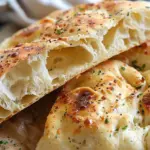
Cook the Bread in a Pan
Now for the exciting part—cooking! Heat a non-stick skillet or a griddle over medium heat. Once hot, place your flattened dough on the skillet. Cook for about 3-4 minutes per side, or until golden brown. You might want to cover the pan with a lid to ensure they cook thoroughly and get that nice, fluffy inside.
Remember, it’s okay if your first loaf isn’t perfect. The magic of home cooking is in the experimentation.
And there you have it—simple steps to preparing delicious no-oven Turkish bread. Serve it warm, and enjoy it with some slices of turkey bacon or chicken ham for a fantastic weekend brunch or a quick snack!
Variations on No-Oven Turkish Bread
Exploring variations of no-oven Turkish bread opens up a world of delicious possibilities, perfect for enhancing your meal or snacking experience. Let’s dive into some fun adaptations that can elevate your bread game.
Stuffed Turkish Bread Options
Why not turn your no-oven Turkish bread into a delightful surprise? Stuffing options are limitless! You could try:
- Feta Cheese & Spinach: This classic combination offers a savory, rich flavor.
- Turkey Bacon & Cheese: For a hearty twist, stuff your bread with crispy turkey bacon and shredded cheese.
- Roasted Vegetables: Fill your dough with a medley of roasted veggies for a healthy and colorful option.
Each bite offers delicious intrigue, making this an ideal choice for brunch or a casual gathering.
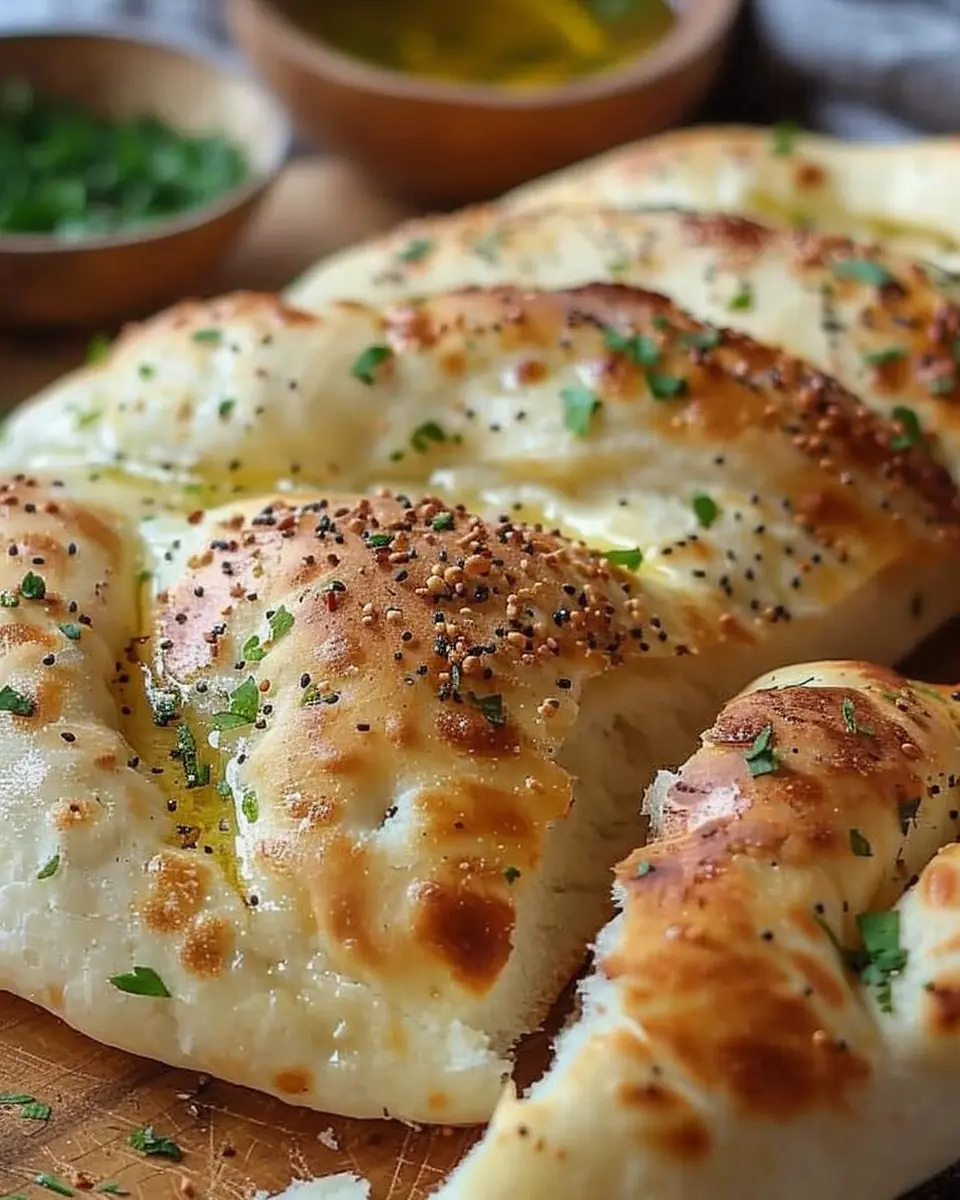
Flavored Flatbreads with Herbs and Spices
Enhancing the flavor of your no-oven Turkish bread can be as simple as incorporating herbs and spices. Consider these flavor boosters:
- Za’atar: This Middle Eastern spice mix adds an aromatic touch that pairs beautifully with olive oil.
- Rosemary and Sea Salt: A classic combo that lends a rustic charm to your flatbreads.
- Garlic and Parsley: Infuse your dough for a fragrant bread that’s perfect for dipping into hummus or tzatziki.
Each of these variations not only enhances flavor but also adds visual appeal.
Gluten-Free Substitutions
If you’re catering to dietary preferences, making no-oven Turkish bread gluten-free is a breeze. Use gluten-free flour blends, almond flour, or oat flour as substitutes. Look for blends that mimic the texture of all-purpose flour for the best results. Additionally, many recipes available on sites like Simply Gluten-Free can guide you further.
Don’t hesitate to experiment with these variations—the results can be just as delightful as the original! Enjoy your culinary journey with these creative adaptations!
Cooking Tips and Notes for No-Oven Turkish Bread
Best practices for kneading and rising
When making no-oven Turkish bread, the dough is your canvas. Start by ensuring your ingredients are at room temperature to promote even rising. When you knead, aim for a smooth and elastic texture. A good rule of thumb is to knead for about 10 minutes, or until the dough springs back when poked. Don’t rush the rising stage; let the dough rest in a warm, draft-free place until it doubles in size. This can take anywhere from 1 to 2 hours, so grab a book or podcast while you wait!
Common mistakes to avoid
Avoid the temptation to add too much flour, as it can result in a dense bread. Keep it sticky at first; this will make for a fluffier final product. Also, be patient with the rising time; skipping it will lead to a less airy bread. And remember—don’t rush the cooking process on the stovetop! Monitor the heat carefully and adjust as necessary to ensure the bottom cooks evenly without burning.
For more tips on bread making, visit King Arthur Baking for expert insights. Happy baking!
Serving Suggestions for No-Oven Turkish Bread
Pairing Ideas with Dips and Spreads
There’s nothing quite like slicing into your no-oven Turkish bread and pairing it with a variety of flavorful dips and spreads.
- Hummus: Rich and creamy, hummus made from chickpeas adds a satisfying texture that complements the bread perfectly.
- Tzatziki: This refreshing yogurt and cucumber dip brings a cool contrast, ideal for summer days.
- Baba Ghanoush: A smoky eggplant dip that pairs wonderfully for those who crave a bit of zest.
- Olive Oil and Balsamic Vinegar: Simple yet elegant, drizzle some olive oil and balsamic for a classic snack.
Meal Ideas to Try
The versatility of no-oven Turkish bread also makes it a fantastic component in various meals. Think beyond the basket and consider:
- Wraps: Use the bread as a wrap for grilled chicken or turkey bacon, along with fresh veggies, for a quick lunch.
- Savory Sides: Serve it alongside a vibrant salad or grilled vegetables for a hearty dinner.
- Breakfast Treats: Try it toasted with avocado and poached eggs for a delicious start to your day.
With these ideas, your no-oven Turkish bread can elevate any dining experience. Want to explore more creative uses? Check out this article on Mediterranean appetizers for inspiration!
Time Breakdown for No-Oven Turkish Bread
When you’re craving something warm and homemade, our no-oven Turkish bread is a perfect choice! Here’s a quick glimpse of the time you’ll need:
Preparation Time
To get those ingredients ready, you’ll spend about 15 minutes mixing and kneading the dough. It’s a straightforward process, and you’ll be amazed at how the aromas fill your kitchen as you work!
Cooking Time
Since this bread cooks on the stovetop, in about 20 minutes, you’ll have golden, fluffy goodness. Just think — no waiting around for an oven!
Total Time
In just 35 minutes, you can enjoy delicious, freshly made no-oven Turkish bread. Perfect for pairing with your favorite dips or enjoying with a meal.
For tips on how to elevate your bread experience, check out this guide on flavor pairings. Happy baking!
Nutritional Facts for No-Oven Turkish Bread
When you whip up a batch of no-oven Turkish bread, understanding its nutritional benefits can elevate your culinary experience. Let’s dive into what each serving offers!
Calories per serving
A single serving of this delightful Turkish bread packs around 150 calories. This makes it an excellent option for those looking to satisfy their cravings without overindulging.
Protein and fiber content
Each slice provides approximately 5 grams of protein and 2 grams of dietary fiber. The balance of protein helps keep you fuller for longer, while the fiber aids in digestion. Who wouldn’t appreciate that?
Key vitamins and minerals
This bread also boasts essential vitamins and minerals, including:
- Calcium: Important for bone health.
- Iron: Vital for energy and overall vitality.
- B Vitamins: Support metabolism and cellular health.
For a deeper dive into bread nutrition, feel free to check out resources on the nutritional value of different bread types for additional insights.
By incorporating this no-oven Turkish bread into your meals, you’re not only satisfying your taste buds but also nourishing your body. So, what are you waiting for? Enjoy every slice!
FAQs about No-Oven Turkish Bread
Can I use regular yeast instead of instant dry yeast?
Absolutely! If you prefer to use regular active dry yeast, it’s totally doable. Just remember to activate it in warm water (around 110°F or 43°C) with a bit of sugar for about 5–10 minutes until it’s frothy. This process ensures that the yeast is alive and ready to help your no-oven Turkish bread rise beautifully. Instant yeast, however, is favored for its convenience, as it doesn’t require activation, making it ideal for quick baking.
How to store leftover Turkish bread?
Leftover no-oven Turkish bread can be a delightful treasure for the next day! To keep it fresh, wrap it tightly in plastic wrap or aluminum foil. You can store it at room temperature for a day or two. For longer storage, slice it and freeze it in an airtight bag. When you’re ready to enjoy it again, simply thaw it at room temperature and reheat it in a pan or skillet for that fresh-out-of-the-pan taste!
What can I serve with No-Oven Turkish Bread?
The great thing about no-oven Turkish bread is its versatility. Here are some delightful options to consider:
- Dips: Serve it with hummus, tzatziki, or a spicy pepper paste for an authentic touch.
- Wraps: Use it as a base for wraps with fillings like Turkey bacon, chicken ham, or roasted vegetables.
- Soups: Pair it with your favorite soups or stews. It’s perfect for dipping!
If you’re eager for more ideas, check out The Spruce Eats for creative pairings!
Embrace creativity in the kitchen with this no-oven Turkish bread recipe, and make every meal a flavorful experience!
Conclusion on No-Oven Turkish Bread
Recap of the Benefits of Making Bread at Home
Making no-oven Turkish bread at home not only saves you from the hassle of preheating but also introduces a fun, rewarding experience. You control the ingredients, ensuring freshness and healthiness. Plus, there’s nothing quite like the aroma of fresh bread wafting through your space, creating a warm, inviting atmosphere.
Encourage Readers to Try Making Their Own
I encourage you to roll up your sleeves and give this simple recipe a try! Experiment with different toppings or fillings. After all, baking is all about creativity and personalization. Imagine impressing friends with your homemade bread; it’s a fantastic conversation starter!
Final Tips for Success in Baking Bread
- Use High-Quality Ingredients: Fresh flour and good quality yeast will make a big difference.
- Patience is Key: Allow dough to rise properly—this affects texture.
- Don’t Be Afraid to Improvise: If you want to toss in herbs or spices, go for it!
For more tips on bread-making techniques, visit King Arthur Baking for in-depth resources on perfecting your home-baking skills. Happy baking!
PrintNo-Oven Turkish Bread: Easy Recipe for Flavorful Homemade Delight
No-Oven Turkish Bread is an easy recipe that delivers a flavorful homemade delight without the need for an oven.
- Prep Time: 10 minutes
- Cook Time: 20 minutes
- Total Time: 30 minutes
- Yield: 6 servings 1x
- Category: Bread
- Method: Stovetop
- Cuisine: Turkish
- Diet: Vegetarian
Ingredients
- 2 cups all-purpose flour
- 1 teaspoon salt
- 1 teaspoon sugar
- 1 teaspoon baking powder
- 1 cup water
- 2 tablespoons olive oil
Instructions
- In a large bowl, mix together flour, salt, sugar, and baking powder.
- Add water and olive oil, and mix until a dough forms.
- Knead the dough on a floured surface for about 5 minutes.
- Divide the dough into smaller portions and roll each into a thin circle.
- Cook each circle on a skillet over medium heat until browned on both sides.
Notes
- For added flavor, you can sprinkle sesame seeds on the dough before cooking.
- Serve with dips or as a side with meals.
Nutrition
- Serving Size: 1 piece
- Calories: 150
- Sugar: 1g
- Sodium: 200mg
- Fat: 5g
- Saturated Fat: 1g
- Unsaturated Fat: 3g
- Trans Fat: 0g
- Carbohydrates: 24g
- Fiber: 1g
- Protein: 4g
- Cholesterol: 0mg
Keywords: No-Oven, Turkish Bread, Homemade, Easy Recipe