Outline for Biscoff Cheesecake
Creating the perfect Biscoff Cheesecake is more than just following a recipe; it’s about capturing the mesmerizing flavors of Biscoff and creating a dessert that brings joy to every bite. This outline will guide you through the entire process, from ingredients to the finishing touches, ensuring that your cheesecake turns out not only delicious but also visually appealing. Let’s dive into this delightful journey together!
Understanding the Flavors of Biscoff
To truly appreciate a Biscoff Cheesecake, it’s important to understand what makes Biscoff cookies so unique. The blend of caramel, spices, and that crispy texture creates a flavor profile that complements creamy cheesecakes beautifully.
- Origin of Biscoff Cookies: Biscoff cookies originated in Belgium and have gained international fame for their distinctive taste. Their lightly spiced flavor, combined with a subtle sweetness, makes them the perfect crust for a cheesecake.
- Texture and Flavor Pairing: When combined with a rich cheesecake filling, the crunchiness of Biscoff balances well with the creaminess, providing a delightful contrast that is sure to impress.
For an even deeper dive into Biscoff’s history and its role in desserts, you might want to check out this fascinating article on the history of Biscoff by Food52.
Essential Ingredients for Your Cheesecake
Before we start mixing things up, let’s go over the essential ingredients that you’ll need to create a show-stopping Biscoff Cheesecake:
-
For the Crust:
-
Biscoff cookies (about 250g)
-
Unsalted butter (approximately 100g)
-
For the Cheesecake Filling:
-
Cream cheese (600g, softened)
-
Granulated sugar (150g)
-
Sour cream (200g)
-
Vanilla extract (1 teaspoon)
-
Eggs (3 large)
-
Biscoff spread (about 150g)
-
For the Topping:
-
Extra Biscoff spread for drizzling
-
Crushed Biscoff cookies for garnish
These ingredients are readily available at most grocery stores or online. When selecting your Biscoff, make sure to grab the original version for that classic flavor!
Preparing Your Biscoff Cheesecake Crust
-
Crushing the Biscoff Cookies: Use a food processor to crumble the Biscoff cookies into a fine powder. If you don’t have a food processor, putting the cookies in a ziplock bag and crushing them with a rolling pin works just as well!
-
Mixing with Butter: Melt the unsalted butter in a microwave-safe bowl. Combine the melted butter with the crushed cookies in a mixing bowl, ensuring that all the crumbs are coated.
-
Forming the Crust: Press the mixture firmly into the bottom of a springform pan. Use the back of a measuring cup to create a solid, even layer. This step is crucial for a sturdy base!
-
Pre-baking (optional): Some like to pre-bake the crust for about 10 minutes at 180°C (350°F) to set the base. If you prefer a softer crust, you can skip this step.
Crafting the Perfect Cheesecake Filling
Now, let’s whip up that luscious filling that will leave everyone craving for more!
-
Cream Cheese Preparation: Make sure your cream cheese is at room temperature. This ensures smooth mixing and helps avoid lumps.
-
Mixing Ingredients: In a large bowl, beat the cream cheese until smooth using an electric mixer. Gradually add the granulated sugar, mixing until combined.
-
Incorporating the Remaining Ingredients: Add in the sour cream, vanilla extract, and Biscoff spread. Blend until completely mixed.
-
Adding in Eggs: Beat the eggs in a separate bowl and then add them one by one to the mixture, mixing at a low speed to incorporate air gently.
Baking Your Cheesecake to Perfection
-
Pouring the Filling: Pour the cheesecake filling onto the prepared crust in the springform pan, spreading it evenly.
-
Using a Water Bath: This step may seem complicated, but it’s worth it! Prepare a water bath by wrapping the springform pan in aluminum foil to prevent water from seeping in. Place the wrapped pan inside a larger baking dish and fill it with boiling water halfway up the sides of the cheesecake pan.
-
Baking Time: Bake at 160°C (320°F) for about 55-70 minutes, or until the center is set but slightly jiggly. Remember, the cheesecake will continue to cook as it cools.
-
Cooling the Cheesecake: Once baked, turn off the oven and crack the door slightly, allowing the cheesecake to cool gradually to avoid cracking.
Chilling and Serving Your Biscoff Cheesecake
After a long baking and cooling process, the final step is to chill your Biscoff Cheesecake before serving:
-
Chill Time: Cover the cheesecake with cling film and chill in the refrigerator for at least 4 hours, but if you have the patience, overnight is even better!
-
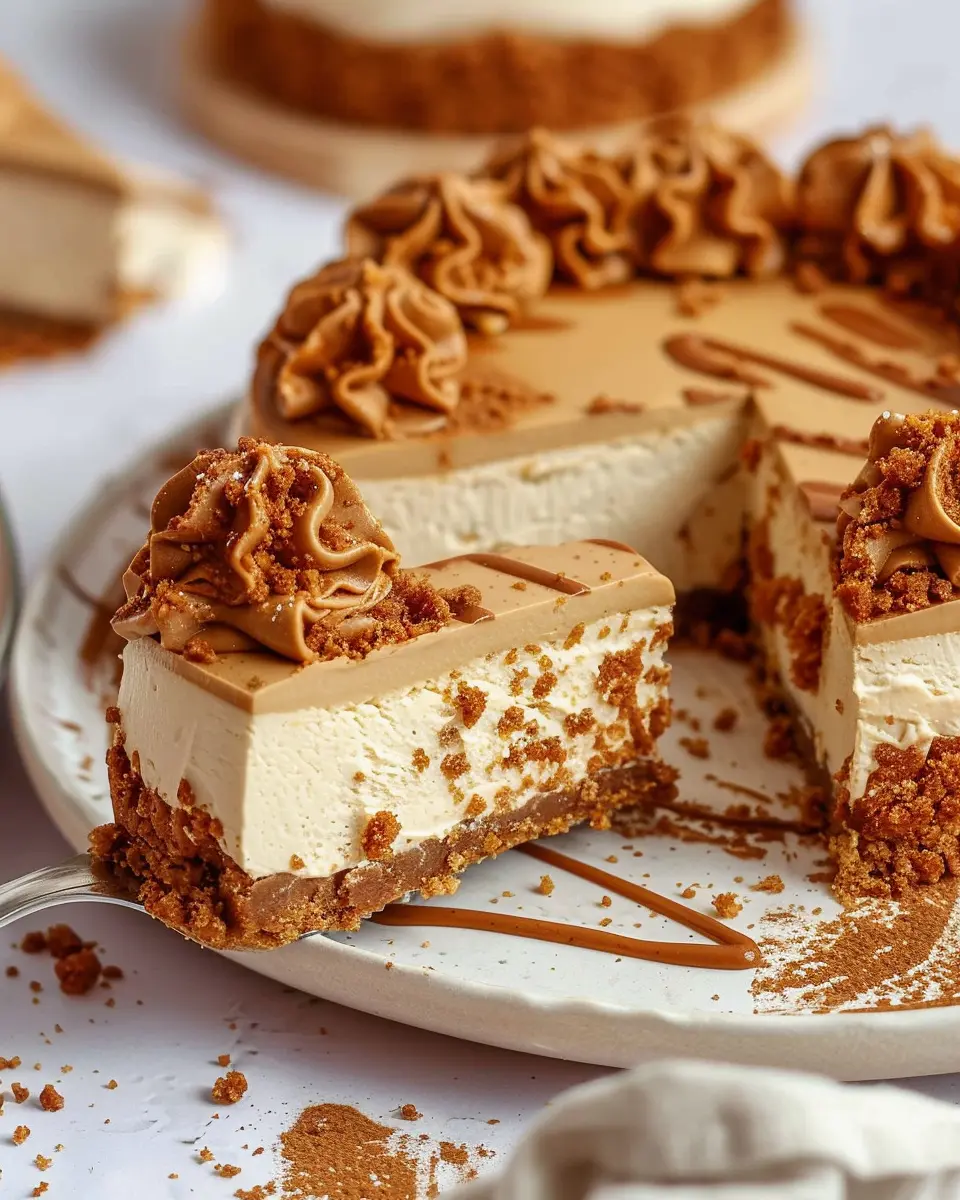
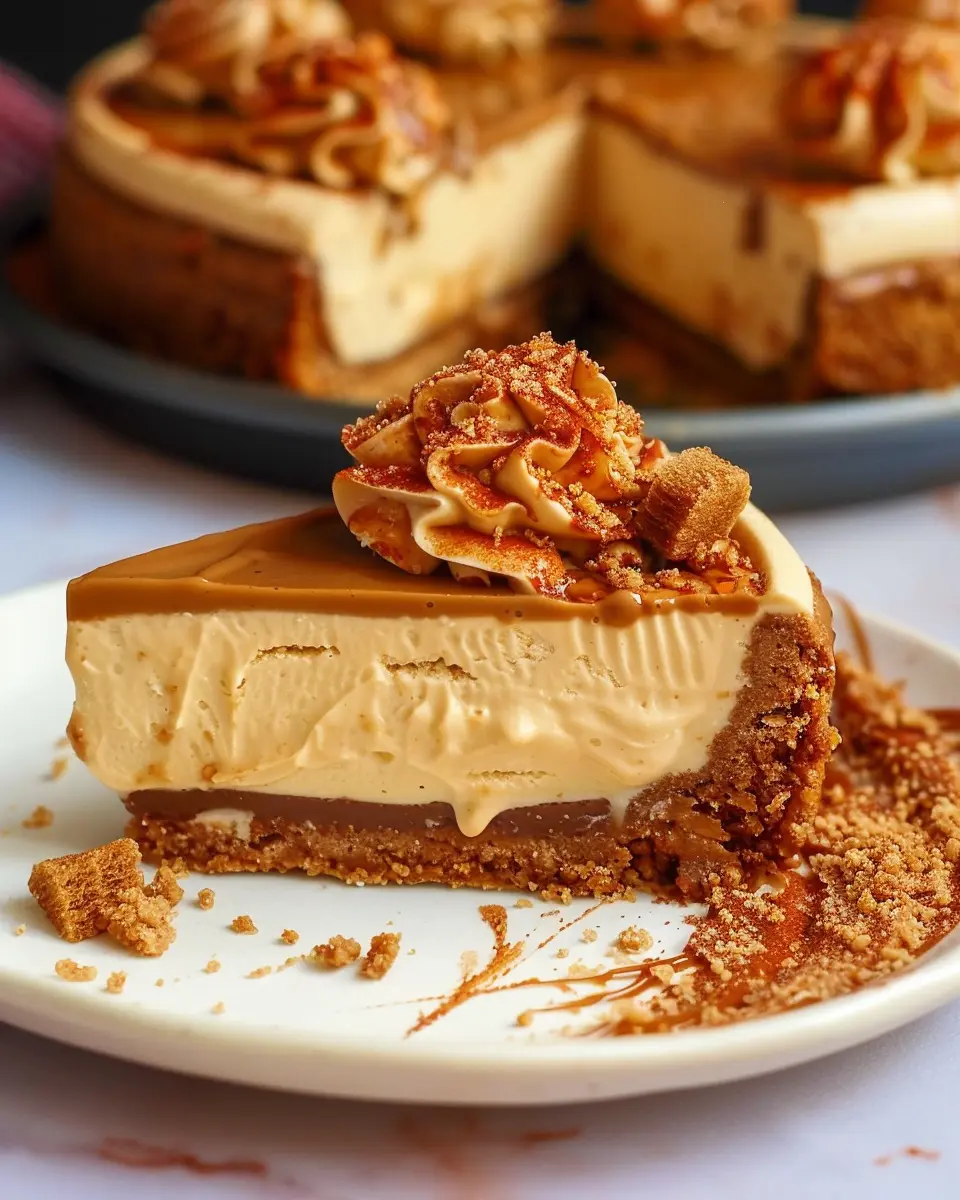
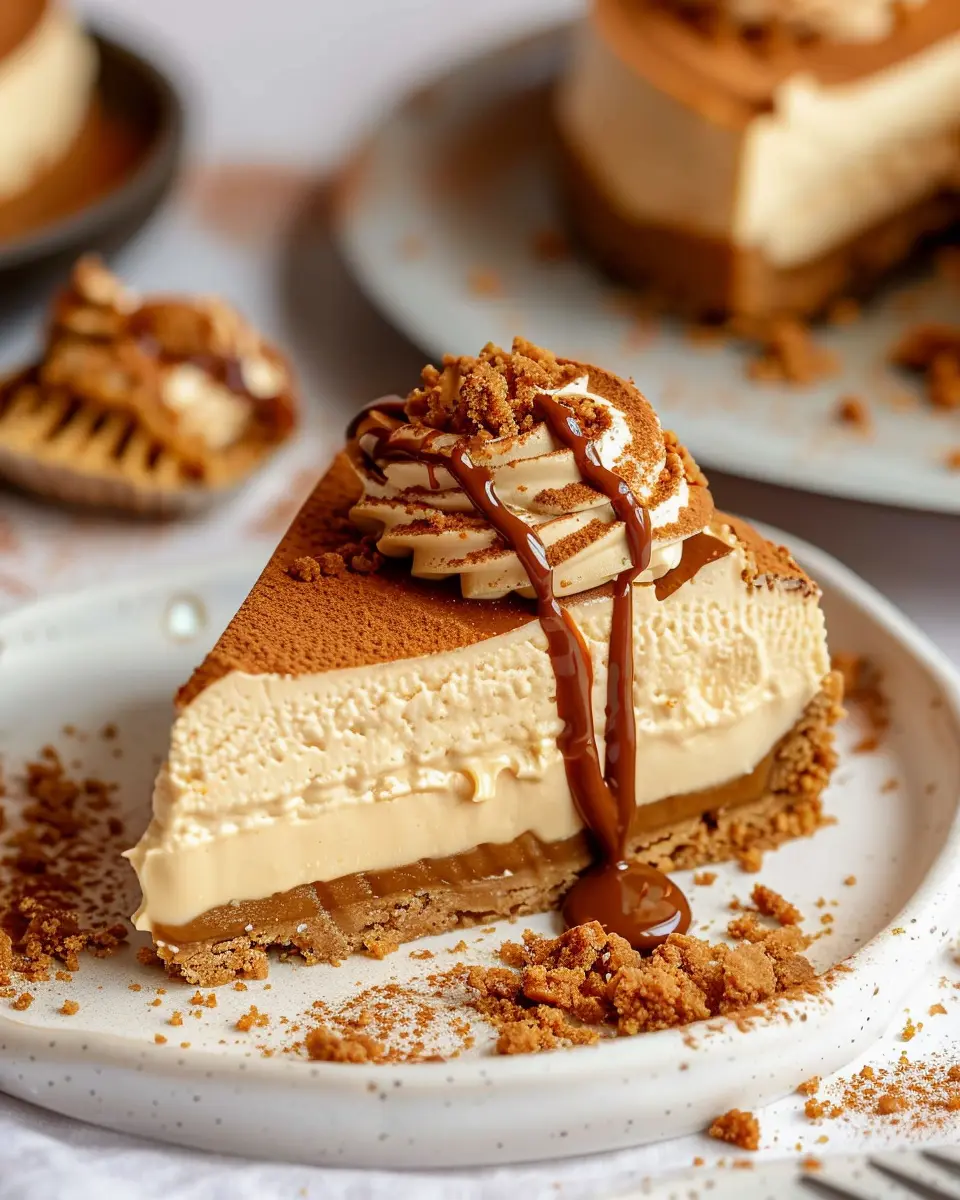
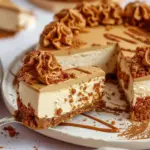
Finishing Touches: Before serving, drizzle some warm Biscoff spread on top and sprinkle with crushed Biscoff cookies. This not only enhances the flavor but also makes for a beautiful presentation.
Creative Serving Suggestions to Impress Your Guests
When it comes to serving, presentation is key. Here are some creative ideas:
- Individual Servings: For a more refined touch, consider making mini cheesecakes in muffin tins. Just adjust the baking time accordingly!
- Tasting Plate: Serve alongside a scoop of vanilla ice cream or whipped cream to enhance the overall experience.
- Coffee Pairing: A cup of fresh, strong coffee makes an excellent pairing with your Biscoff Cheesecake, echoing the original flavors of the Biscoff cookie.
Storing Your Cheesecake for Later Enjoyment
If there’s any leftover cheesecake (which is always a sad possibility), here’s how to store it:
- Refrigerate: The cheesecake can be stored in an airtight container in the refrigerator for up to one week.
- Freezing: If you want to enjoy it later, freeze individual slices wrapped in plastic wrap and placed in a freezer-safe container for up to three months!
Final Thoughts: The Joy of Making Biscoff Cheesecake
Creating a Biscoff Cheesecake is a labor of love that yields a reward far beyond the effort put in. Whether it’s a special occasion, a dinner party, or just because you deserve a treat, this creamy and delicious dessert will always impress.
So, next time you’re looking to indulge or impress, remember: the beauty of this cheesecake lies in its simplicity and the amazing flavors of Biscoff. Grab your ingredients, follow this outline, and enjoy the delightful journey of baking your very own Biscoff Cheesecake!
Introduction to Biscoff Cheesecake
Why Homemade Desserts Are a Game-Changer
There’s something special about whipping up a homemade dessert. It’s not just about the sweetness; it’s about the joy and satisfaction that come from creating something delicious with your own hands. For busy young professionals, making desserts like Biscoff Cheesecake can be a great way to unwind after a hectic week. Imagine taking a brief break from your packed schedule to indulge your senses while making a treat that is both simple and oh-so-satisfying.
Research has shown that baking at home can boost your mood and improve overall well-being (source: Psychology Today). Plus, when you make it yourself, you control the ingredients, ensuring your treat is free from preservatives and unnecessary additives. What could be better than indulging in something you created from scratch?
The Irresistible Allure of Biscoff
Now, let’s talk about what truly makes Biscoff Cheesecake a standout dessert. The magic lies in the beloved Biscoff cookie spread, made from delicious caramelized biscuits. With its rich, unique flavor, it elevates your cheesecake from ordinary to extraordinary. The blend of sweet and slightly spiced notes makes every bite a delightful experience. You can find Biscoff products easily at grocery stores, making it accessible for home bakers everywhere.
The versatility of Biscoff means that it pairs beautifully with various textures, and it can be used in countless dessert recipes. Are you a chocolate lover? Try adding chocolate drizzle. Prefer something nutty? Consider crushed pecans as a topping. The choices are endless!
A Perfect Dessert for Busy Young Professionals
In today’s fast-paced world, young professionals often find it challenging to dedicate time to culinary endeavors. That’s why this Biscoff Cheesecake recipe is perfectly designed for you. With minimal prep time and a few straightforward steps, you can enjoy a delicious dessert without spending your whole weekend in the kitchen. Plus, it stores well in the fridge, making it a delightful treat to share—or to savor all by yourself throughout the week.
So, why not embrace the joy of baking? Your taste buds will thank you, and you might just find that creating something sweet and satisfying can be an excellent escape from your daily grind. To get started, check out our easy recipe for Biscoff Cheesecake and let the fun begin!
Ingredients for Biscoff Cheesecake
Essential ingredients for a five-star cheesecake
Creating the perfect Biscoff Cheesecake starts with a few key ingredients that elevate your dessert from ordinary to extraordinary. Here’s what you’ll need:
- Cream Cheese: The cornerstone of any cheesecake, opt for full-fat cream cheese for that rich, smooth texture.
- Biscoff Cookies: These not only form the crust but also contribute to the flavor. Crushed Biscoff cookies create a delightful contrast to the creamy filling.
- Heavy Cream: Whipping cream adds that light, airy quality which makes every slice melt in your mouth.
- Sugar: A touch of sugar balances the flavors, ensuring your cheesecake is sweet but not overwhelmingly so.
- Vanilla Extract: A splash of vanilla enhances the overall flavor profile—don’t skip it!
Importance of quality ingredients
When it comes to any recipe, especially something as indulgent as a Biscoff Cheesecake, quality truly matters. Using high-grade ingredients can make a tangible difference in taste and texture. For instance, real vanilla extract provides a warmth that imitation vanilla simply can’t replicate. Plus, fresh cream cheese will create a velvety consistency compared to low-fat alternatives.
Tips for sourcing the best Biscoff products
To find the finest Biscoff products, consider the following tips:
- Local Supermarkets: Many carry Biscoff cookies in the international aisle.
- Online Vendors: Websites like Amazon or specialty food stores often have a wider selection, including spreads, which could enhance your cheesecake even more.
- Seasonal Markets: If you enjoy artisanal products, check local markets for homemade variants that could surprise you.
With the right Biscoff ingredients in hand, you’re well on your way to creating that show-stopping cheesecake everyone will love!
Step-by-step preparation of Biscoff Cheesecake
Creating a delightful Biscoff Cheesecake is not just about mixing ingredients; it’s about crafting a dessert that offers pure indulgence with every bite. This recipe draws on the unique flavor of Biscoff cookies, and trust me, there’s little that can elevate your dessert game quite like it. Let’s jump into the step-by-step process of making this creamy, dreamy cheesecake.
Gather your ingredients and tools
Before diving into the culinary adventure, it’s essential to set yourself up for success. You’ll want to gather all your ingredients and tools ahead of time. Here’s what you’ll need:
Ingredients:
- 250g Biscoff biscuits (plus extra for garnish)
- 125g unsalted butter
- 400g cream cheese (softened)
- 200ml double cream
- 100g icing sugar
- 1 tsp vanilla extract
- 4 tbsp Biscoff spread (for the topping)
Tools:
- A springform cake tin
- Mixing bowls
- A spatula or whisk
- A food processor (optional)
- Measuring cups and spoons
With everything ready, you’re on the right track for a seamless baking experience. Need some more tips on ingredient selection? Here’s a great source for choosing the best cream cheese.
Make the buttery Biscoff biscuit base
The foundation of your Biscoff Cheesecake is its splendid base. Start by preheating your oven to 180°C (350°F). While it heats, crush your Biscoff biscuits into fine crumbs. You can do this by placing them in a food processor or putting them in a ziplock bag and crushing them with a rolling pin.
Next, melt the unsalted butter and combine it with the crushed biscuits. The mixture should hold together when squeezed between your fingers. If it doesn’t, add a bit more melted butter.
Press this mixture firmly into the base of your springform tin, creating an even layer. Bake for about 10 minutes, then let it cool while you prepare your cheesecake filling.
Whip up the creamy cheesecake filling
Once the base has cooled, it’s time to focus on the star of the show—the cheesecake filling. In a large mixing bowl, combine your softened cream cheese, icing sugar, and vanilla extract. Using a handheld mixer, beat them together until smooth and creamy.
In a separate bowl, whip the double cream until it achieves soft peaks. Gently fold the whipped cream into the cream cheese mixture. Be careful not to deflate the whipped cream; you want all that fluffy goodness!
To enhance the Biscoff flavor, fold in a few tablespoons of Biscoff spread until the mixture is well combined. Now, you have a luscious filling that could almost stand alone as a dessert!
Combine and chill for perfection
Pour the Biscoff Cheesecake filling over your cooled biscuit base, smoothing it out with a spatula. Pop it into the fridge for at least four hours, or better yet, overnight. Chilling is essential; it allows the flavors to meld beautifully and the cheesecake to set perfectly.
Prepare the indulgent Biscoff topping
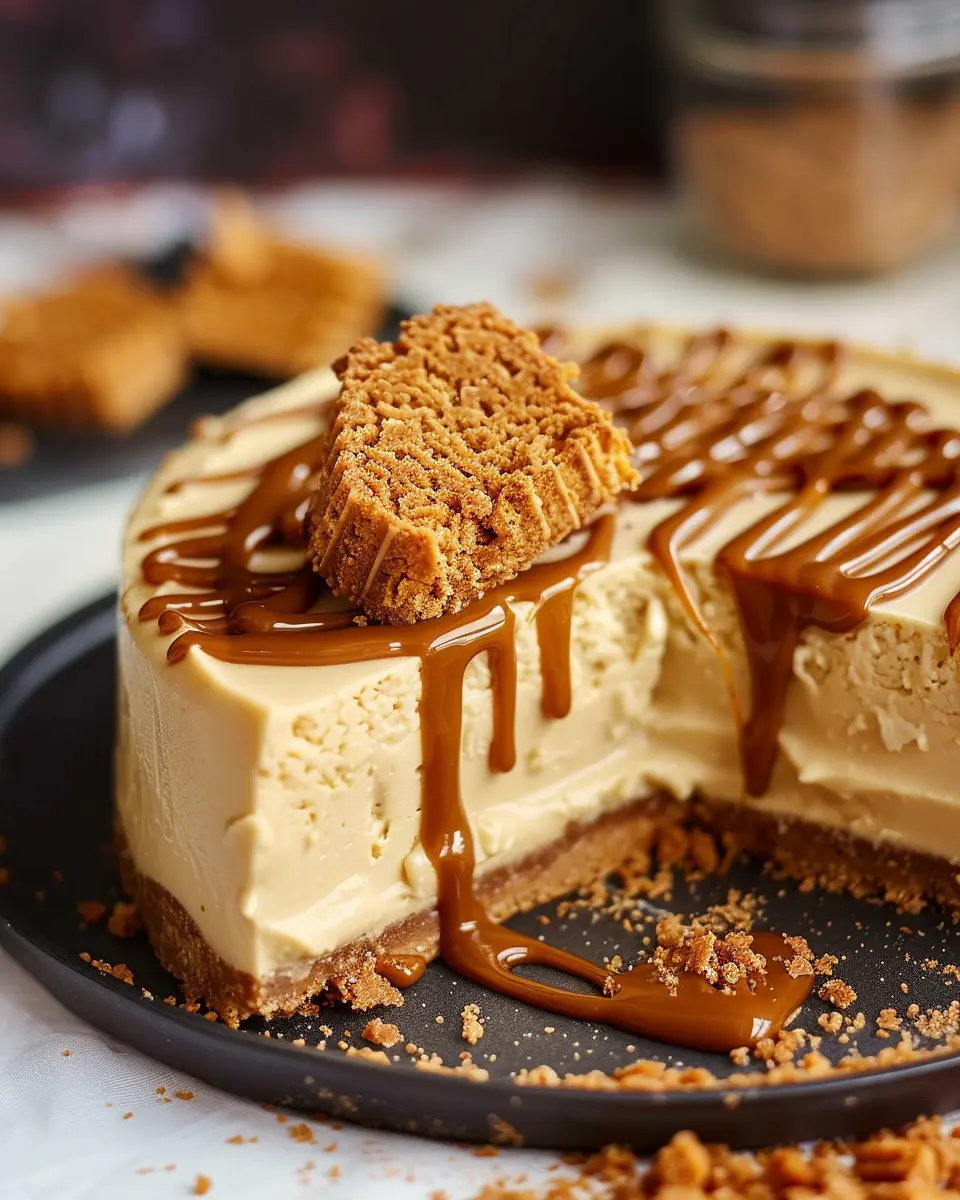
While your cheesecake is chilling, let’s make it even more irresistible with a Biscoff topping. Simply melt the Biscoff spread in a microwave or over a double boiler until warm and pourable. Once the cheesecake has set, drizzle the Biscoff spread over the top, letting it cascade down the sides. For an extra touch, crush some reserved Biscoff biscuits and sprinkle those on top as well.
Serve with a flourish
When you’re ready to impress your guests, remove the cheesecake from the springform tin. Use a hot knife to slice through the creamy layers for clean edges; a little tip I love is dipping the knife in warm water between cuts. Serve each slice on a plate, perhaps accompanied by a dollop of whipped cream or a scoop of vanilla ice cream for that extra special touch.
This Biscoff Cheesecake is not only a feast for the eyes but a true delight for your taste buds. Trust me, once you serve it up, your friends will be asking for seconds—and that’s the ultimate compliment in any dessert endeavor! Happy baking!
Delicious Variations on Biscoff Cheesecake
Biscoff Cheesecake with Different Flavors
One of the best things about a Biscoff cheesecake is its versatility. While the classic version is incredible on its own, you can easily jazz it up with some different flavors to please any palate.
- Chocolate Swirl: Blend in some melted dark chocolate for a rich, indulgent twist.
- Caramel Delight: Drizzle caramel sauce in the batter before baking for a decadent treat.
- Nutty Cinnamon: Add ground cinnamon and chopped nuts (like pecans or walnuts) to the crust for extra flavor and crunch.
Feel free to experiment! If you want to dive deeper into flavor combinations, Bon Appétit often features unique cheesecake recipes that can inspire your creativity.
Gluten-Free Biscoff Cheesecake Option
For those with gluten sensitivities, you don’t have to miss out on this delightful dessert. Substitute the traditional crust with gluten-free cookies or almond flour. This simple swap allows everyone to enjoy the deliciousness of a Biscoff cheesecake. Just remember to double-check any packaged ingredients for gluten content!
Experimenting with Toppings and Mix-Ins
The fun doesn’t end with the batter; toppings can take your Biscoff cheesecake to the next level. Consider:
- Whipped Topping: A dollop of freshly whipped cream adds a light touch.
- Biscoff Spread: Use a layer of Biscoff spread on top for a creamy finish that complements the flavor beautifully.
- Fresh Fruits: Slices of strawberries or raspberries provide a refreshing contrast to the rich cheesecake.
Mix and match these toppings, and let your creativity shine! You’ll never run out of ways to elevate your dessert, making it as unique as you are. For more ideas on mixing flavors, check out this article on innovative dessert toppings from Food Network.
By experimenting with flavors, gluten-free adjustments, and creative toppings, your Biscoff cheesecake will be a delightful centerpiece for any occasion!
Cooking Tips and Notes for Biscoff Cheesecake
Common pitfalls to avoid
When making your Biscoff cheesecake, there are a few common missteps to steer clear of. Firstly, don’t overmix your batter; this can lead to a dense texture instead of the light and creamy result you want. Secondly, let your cream cheese come to room temperature before beating it—this ensures smooth mixing and prevents lumps. Lastly, be cautious with the oven temperature; every oven is different. Using an oven thermometer can help you avoid baking at the wrong temperature.
Tips for achieving the perfect texture
To achieve that dreamy texture, consider using a water bath during baking. This method helps regulate the temperature and keeps the cheesecake moist. Also, letting it cool slowly in the oven (after turning it off) will prevent cracks from forming on the surface. For an extra touch, fold in some whipped cream for a lighter filling.
Storage tips for cheesecake freshness
Once your Biscoff cheesecake is cooled and set, wrap it tightly in plastic wrap or store it in an airtight container. It will stay fresh in the fridge for up to five days—perfect for those late-night cravings! If you want to keep it longer, feel free to freeze individual slices; just make sure to use freezer-safe containers. For more storage tricks, check out sources like Food Network for tips on cheesecake preservation.
Serving suggestions for Biscoff Cheesecake
Pairing ideas for an impressive dessert spread
When hosting a gathering, complementing your Biscoff Cheesecake with the right accompaniments can elevate the entire dessert experience. Consider serving it alongside:
- Fresh berries: Raspberries or strawberries add a vibrant contrast and a refreshing touch.
- Whipped cream: A dollop on each slice is always a crowd-pleaser.
- Coffee or tea: Serve with a rich espresso or soothing herbal tea to balance the sweetness.
- Chocolate drizzles: A bit of melted chocolate on top brings in a luscious twist.
For more pairing inspiration, check out this dessert pairing guide.
Creative serving styles to wow your guests
Presentation is key! Here are a few fun ways to serve your Biscoff Cheesecake:
- Mini Cheesecakes: Use muffin tins to create individual servings, perfect for a cocktail party.
- Jar Desserts: Layer cheesecake and toppings in small glass jars for a pretty and portable option.
- Cheesecake Dip: Turn your cheesecake into a dip by softening it and serving it with graham crackers and fruit slices.
These creative presentations not only delight the eyes but also make every guest feel special. After all, who doesn’t love a dessert that looks as good as it tastes?
Time breakdown for Biscoff Cheesecake
Preparation time
Making your delectable Biscoff Cheesecake typically takes about 20 minutes. This is when you’ll be gathering your ingredients, crushing those iconic cookies for the crust, and mixing the creamy filling to perfection. It’s a quick and enjoyable process that gets you one step closer to a delicious treat!
Chilling time
The trick to a perfectly set cheesecake lies in its chilling time, which can take 4–6 hours, depending on how firm you like your cheesecake. If you’re planning ahead, consider letting it sit overnight for an even creamier texture.
Total time
When you combine the preparation and chilling time, your total commitment to this delightful Biscoff Cheesecake will be around 4.5 to 6.5 hours. This includes time for your cake to reach its full potential in flavor and richness. So, whether you’re preparing for a gathering or simply treating yourself, this cheesecake is well worth the wait!
For more tips on how to make the perfect cheesecake, check out this resource.
Nutritional Facts for Biscoff Cheesecake
Calories per serving
When indulging in a slice of Biscoff Cheesecake, you can expect roughly 300 calories per serving. This delightful dessert offers a tasty treat without completely derailing your daily calorie intake.
Key nutrients in each slice
Beyond the calories, Biscoff Cheesecake packs in some essential nutrients:
- Calcium: Crucial for bone health, each slice contributes to your daily calcium intake.
- Vitamin A: Important for vision and immune function, you’ll find a good amount in this creamy dessert.
- Sugars: While it does offer a sweet satisfaction, keep an eye on the sugar content, which is about 20 grams.
For more specific nutritional insights, consider checking resources like NutritionData or USDA FoodData Central, which can provide detailed information on these ingredients. Remember, moderation is key! Enjoy your Biscoff Cheesecake guilt-free by keeping portions in check.
FAQs about Biscoff Cheesecake
Biscoff Cheesecake is a delightful treat that raises a few questions, especially if you’re making it for the first time. Let’s dive into some common queries to help you navigate your baking journey smoothly!
Can I make this recipe ahead of time?
Absolutely! The great thing about a Biscoff Cheesecake is that it can be made a day or two in advance. In fact, allowing it to set in the fridge overnight can enhance the flavors and give it a creamier texture. Just make sure to cover it well with plastic wrap to ensure it stays fresh and doesn’t absorb any odors from your fridge. If you want to upscale your prep, feel free to freeze it for longer storage—just remember to thaw it in the refrigerator before serving.
What if I don’t have Biscoff spread?
No worries! If you can’t find Biscoff spread, you can easily substitute it with any cookie butter spread. Brands like Speculoos or even a homemade version using crushed cookies mixed with a bit of oil will work well. The key is to create that sweet, spiced flavor profile, so experiment until you find the perfect alternative for your palate.
How do I know when the cheesecake is set?
A perfectly set Biscoff Cheesecake should have a slightly wobbly center when you gently shake the pan. It’s similar to checking a regular cheesecake. You want it to be firm around the edges but with just a little jiggle in the middle. After refrigerating, it will firm up even more, creating that luscious, creamy consistency you’re craving. Remember, patience is key, and biting the bullet to let it chill properly will be worth it in the end!
For more insights, you might consider checking out Baking Basics for tips on perfecting cheesecake recipes. Happy baking!
Conclusion on Biscoff Cheesecake
Time to Try Your Hand at Biscoff Cheesecake
If you’ve been searching for a showstopper dessert that’s both delicious and easy to make, this Biscoff Cheesecake is calling your name. Don’t hesitate—gather your ingredients and experience the joy of whipping up this creamy delight. Trust me; you won’t regret it!
Savoring Homemade Desserts
Homemade desserts carry a special charm, bringing comfort and satisfaction that store-bought options simply can’t match. The process of creating something from scratch fosters creativity and is a chance to impress family and friends. Remember, the heart of baking is all about having fun and sharing love through food. So, roll up your sleeves and create delightful memories with your Biscoff Cheesecake! For more dessert inspiration, check out BBC Good Food and King Arthur Baking.
PrintBiscoff Cheesecake Bliss: Easy Recipe for the Perfect Treat
Indulge in the creamy, dreamy goodness of Biscoff Cheesecake, a deliciously easy dessert that’s perfect for any occasion.
- Prep Time: 20 minutes
- Cook Time: 45 minutes
- Total Time: 4 hours 15 minutes
- Yield: 8 servings 1x
- Category: Dessert
- Method: Baking
- Cuisine: American
- Diet: Vegetarian
Ingredients
- 8 ounces cream cheese
- 1 cup Biscoff cookie crumbs
- 1/2 cup granulated sugar
- 1/4 cup unsalted butter, melted
- 1 cup heavy whipping cream
- 1 teaspoon vanilla extract
- 1/4 cup Biscoff spread
Instructions
- Preheat your oven to 325°F (160°C).
- In a bowl, combine Biscoff cookie crumbs and melted butter. Press this mixture into the bottom of a 9-inch springform pan.
- In a separate bowl, beat the cream cheese and sugar until smooth. Add in the vanilla extract and Biscoff spread, mixing well.
- In another bowl, whip the heavy cream until stiff peaks form. Gently fold the whipped cream into the cream cheese mixture.
- Pour the cheesecake filling over the crust in the springform pan, smoothing the top.
- Bake for 45 minutes or until the center is set. Let it cool, then refrigerate for at least 4 hours before serving.
Notes
- For extra flavor, drizzle more Biscoff spread on top before serving.
- Make sure to fully cool the cheesecake before refrigerating to achieve the best texture.
Nutrition
- Serving Size: 1 slice
- Calories: 350
- Sugar: 20g
- Sodium: 150mg
- Fat: 28g
- Saturated Fat: 16g
- Unsaturated Fat: 8g
- Trans Fat: 0g
- Carbohydrates: 25g
- Fiber: 1g
- Protein: 4g
- Cholesterol: 80mg
Keywords: Biscoff, Cheesecake, Dessert, Easy Recipe